 |
Today was Day One of Season '05, and the question was,
"where do I start first?" The port side stern pulpit was not the
right answer: I drilled its holes about a
Ľ" too far aft, just hitting the plywood
frame in the transom, leaving no room for the "blind mounting kit's"
toggle bolts. (They don't call it "blind mounting" for nothing!) I
filled the errant holes with a mixture of epoxy, colloidal silica and
some white tint then moved on to the starboard side. The second time
around I drilled the holes Ľ" more forward, the pulpit's aft foot right
on the forward edge of the transom, and got it perfect. "Practice makes
perfect," and this wasn't the first time I've had to do a job
twice before getting it right -- just the first time this season!
(Apr. 9, 2005)
Go to Stern Pulpit,
Stanchions and Lifelines Project |
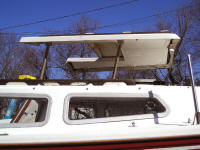 |
While below in the cabin removing that one old stanchion, I noticed that
the pop top gasket had dramatically deteriorated from last season; the
few small gaps were now gaping spaces ... so I jumped to yet another
new project ...
I've never been able to raise the pop top since I've had
Chip Ahoy: the gasket had cemented it solid to the cabin top; lifting it
was impossible. This was extremely low on my priority list of things
that needed to get done back then, so I put it aside for someday
down the road, maybe. This is the year, and this is the first time I've
had it up, thanks to two more years of gasket deterioration. (Apr. 9,
2005)
Go
to Pop Top Project |
 |
The rudder modifications are now completed. (Apr. 15,
2005)
Go to Solving the Rudder Slop
Project
Go to the Increasing Rudder
Lift Leverage Project |
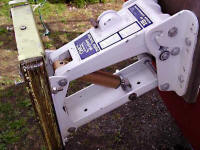 |
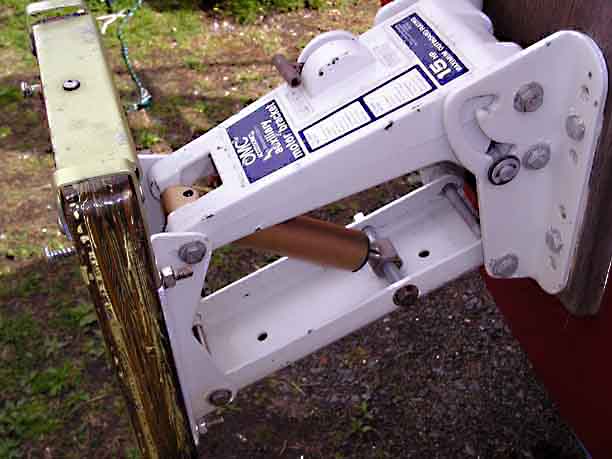
I added a booster assist gas-operated cylinder to Chip
Ahoy's adjustable OMC motor mount, which will make hauling up the
Tohatsu 9.9 hp outboard a whole lot easier. (Apr. 24, 2005)
Go to Outboard Motor Mound Project |
 |
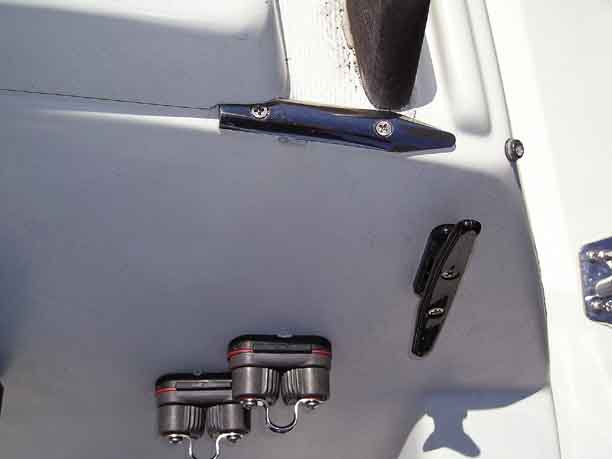
Last season, after completing the
All Lines Led Aft
project, a new problem developed: the lines coming back to the cockpit
were wearing grooves in the fiberglass where they turned over the cabin top
edge. Once I recognized this, I took
precautions when hauling in on them to minimize the wear, but recognized
that a better and permanent solution was needed. Wally Riddle ("Carpe Diem")
offered one after stopping by the other day: stainless steel rub strakes
he saw advertised by West Marine. I bought a pair and installed them
today. (Apr. 29, 2005)
Go to Rub Strakes
Modification |
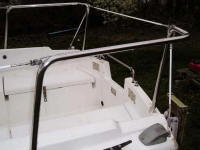 |
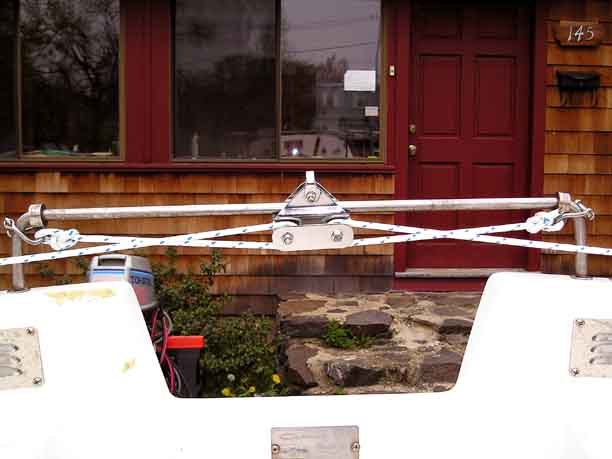
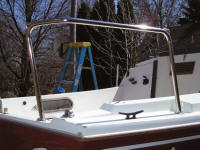
I've not been satisfied with the end result after
installing the stern pulpit, how wobbly the two stern rails were when
any pressure was applied to the stern lifeline connecting the two. Using
Skip Meisch's modification as a plan, I reinforced the two rails
using mostly remnant parts, materials and tools from past projects.
After about an hour and a half's labor, the stern pulpit is now rock
solid. (May 1, 2005)
Go to Reinforcing the
Stern Pulpit |
 |
I've added a traveler car and control lines
leading forward this year so
that I won't have to dig out the pliers and wrestle with those
nuisance thumbscrews each time I want to adjust the mainsheet traveler.
Go to Traveler Car
and Control Lines Project |
 |
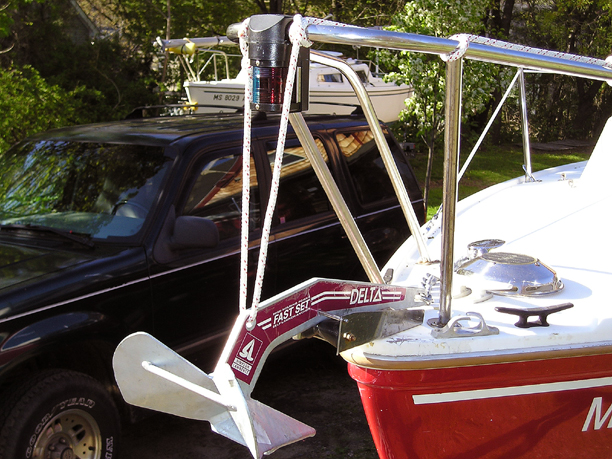
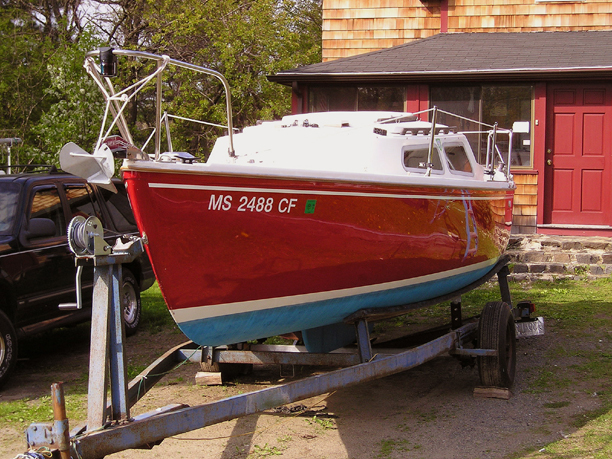
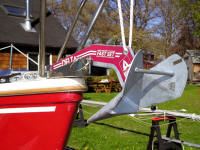
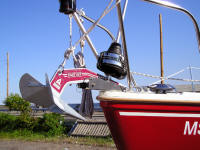
For the first two years, I've used a 14 pound Danforth as
my primary anchor. (I've got a 9 pound Danforth with chain and rode
stowed beneath the cockpit sole as a backup.) This season I've
changed over to a 14 pound Lewmar Delta
(Simpson-Lawrence) Fast Set anchor. It's
reportedly a superior anchor with better holding power on most
bottoms, and I've rigged it to ride better on the bow roller. The fluke and anchor
are one-piece so the flukes won't bounce with the
waves like the Danforth's tended to do,
even tied down.
"Carpe Diem," Wally Riddle's C22, is parked in the background. (May 13,
2005)
See close-up details |
 |
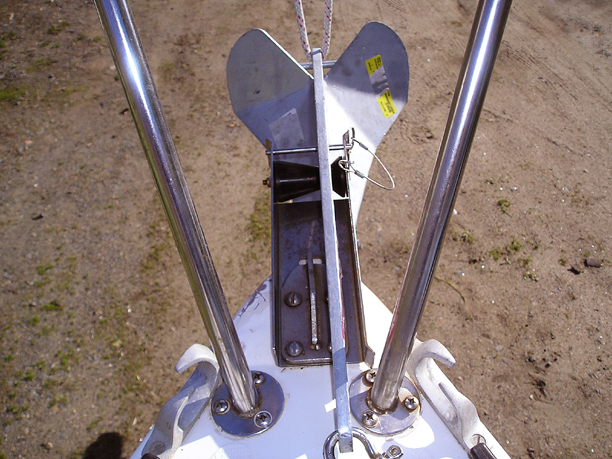
I drilled a hole through its shank in line with the quick
release pin holes in the anchor roller, then inserted the pin.
See
close-up details |
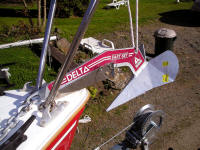 |
The Delta Fast Set anchor has a hole for a
trip line that can
be added to assist breaking loose the anchor from the bottom. I used it
to further secure the anchor away from the bow, running a line through it and up to the
bow pulpit. |
 |
The anchor and roller seen from topside.
See close-up
details |
 |
I didn't like the way I'd run the line ran from the anchor trip
line hole: it somewhat obstructed the running lights. So after waxing
the boat today, I rearranged the line, tying if off further back on the
bow pulpit. (May 14)
See close-up details
of the anchor/pulpit
Detailed
enlargement of hull after waxing (large file)
Like a mirror, it reflects the shadow of the boat and anchor,
and even the nearby step ladder straddling the roller-furler. |
 |
The anchor and roller after the roller-furler is mounted
while the boat is rigged and readied for launch. The furler drum clears the
anchor shank by about an inch, as I'd hoped it would. I added a 25' trip
line, clipped to the pulpit with a carabineer on its end. The carabineer
attaches to the twist shackle on the anchor when deployed; the other end
will be tied to a spare fender for flotation. (Jun. 1, 2005)
See
close-up detail |
|
See:
Problems
later encountered with this anchor/roller setup
See: Installing
Anchor Suspension Jaw Clamps on Bow Pulpit |
|
NEXT |
|
It's never-ending ...
but spring has arrived and Sailing Season '05 is in sight |